Skip to content
About
Jobs
Login
Bear's Books
Equip
Explore
Empower
Articles
Culture
Experts
Features
How To
News
Opinion
Reviews
Travel
Videos
Activities
Action Sports
Biking
Camping
Climbing
Hiking
Running
Water Sports
Winter Sports
Subjects
Adventure
Food
Gear
Health
International
National Parks
Science
Survival
Wildlife
Shop
Equip
Explore
Empower
About
Shop
Jobs
Login
Bear's Books
×
Camping
6 Best SUV Tents
Culture
The Ha‘ikū Stairs Trail, an Illegal Hiking Path in O’ahu, Will Be Demolished
News
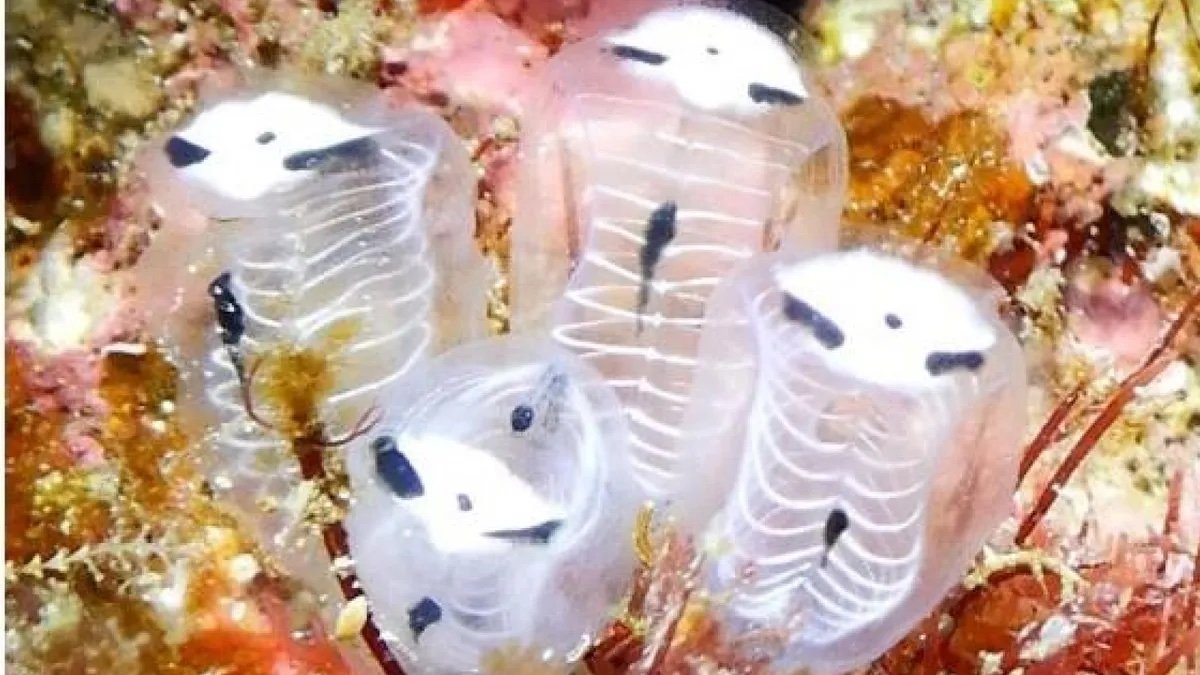
WATCH: Sea Squirt With a Panda Face
Equip
Camping
6 Best SUV Tents
Camping
6 of the Best Coolers for Camping
Gear
6 Best Canopy Tents in 2024
More Equip
Explore
Culture
The Ha‘ikū Stairs Trail, an Illegal Hiking Path in O’ahu, Will Be Demolished
Conservation
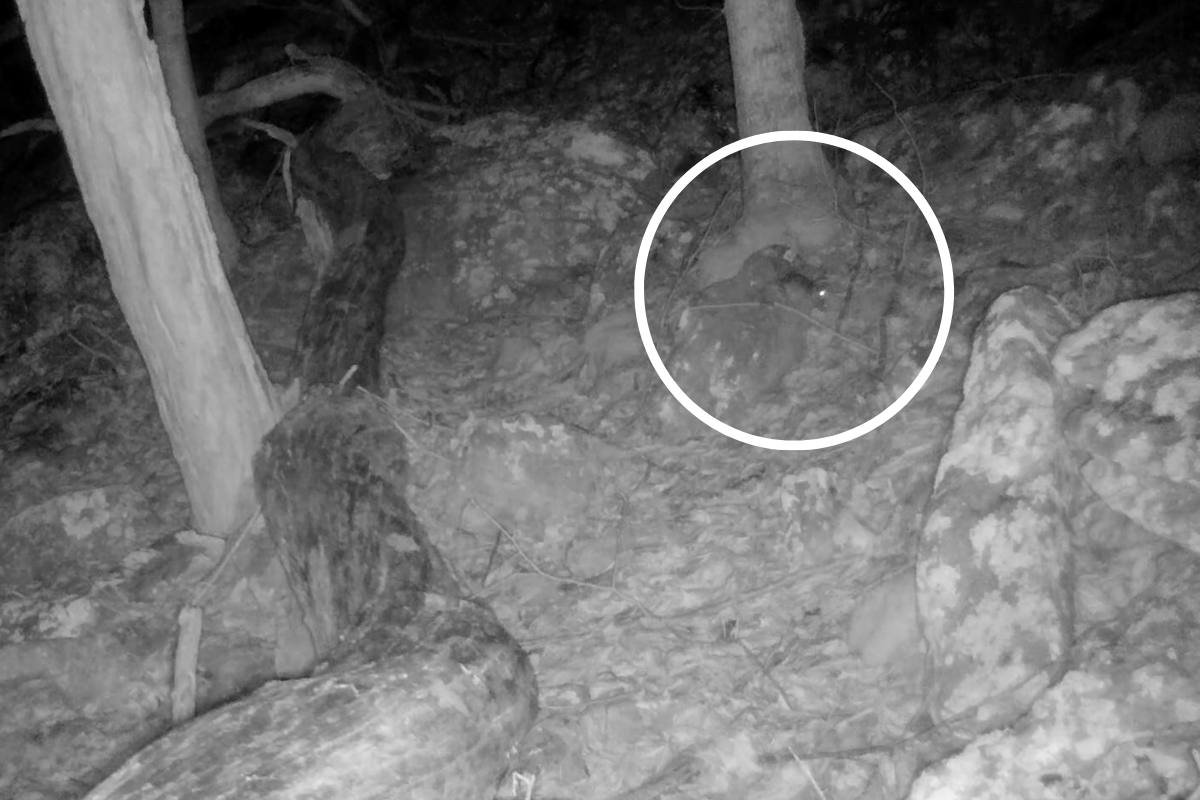
Adorable and Threatened: ‘Species of Concern’ Spotted on Trail Cam
Culture
Next Time You See Bigfoot, It’s Probably Just Rob Lowe
More Explore
Empower
Culture
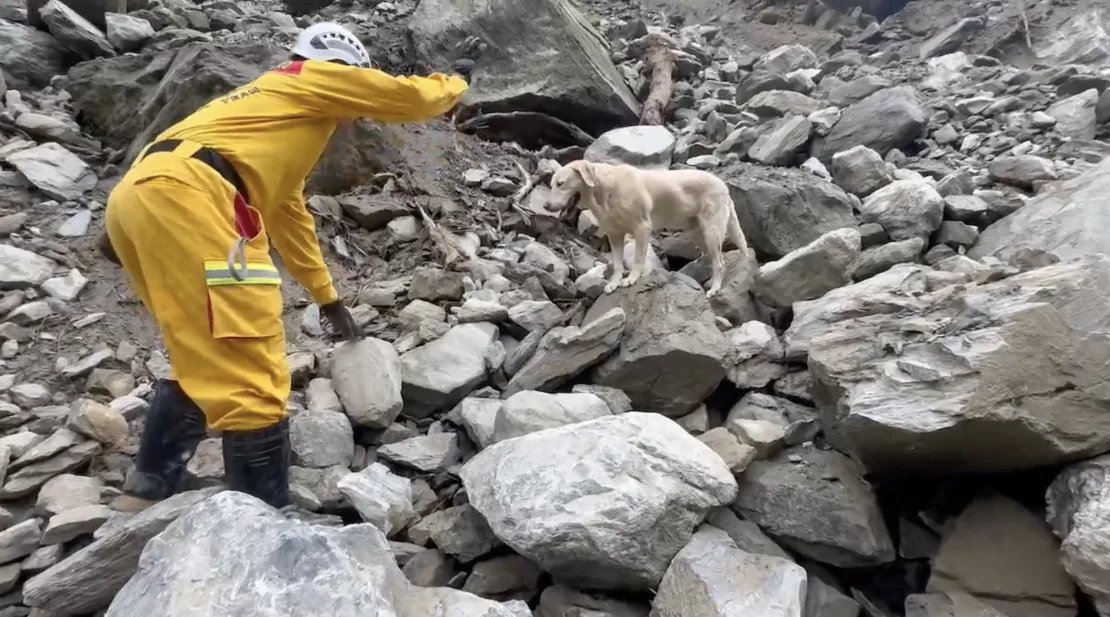
‘Too Friendly’ Labrador Finds Purpose Rescuing Quake Victims
Video
WATCH: Three-Legged Deer Makes Cameo on Maine Trail Cam
Conservation
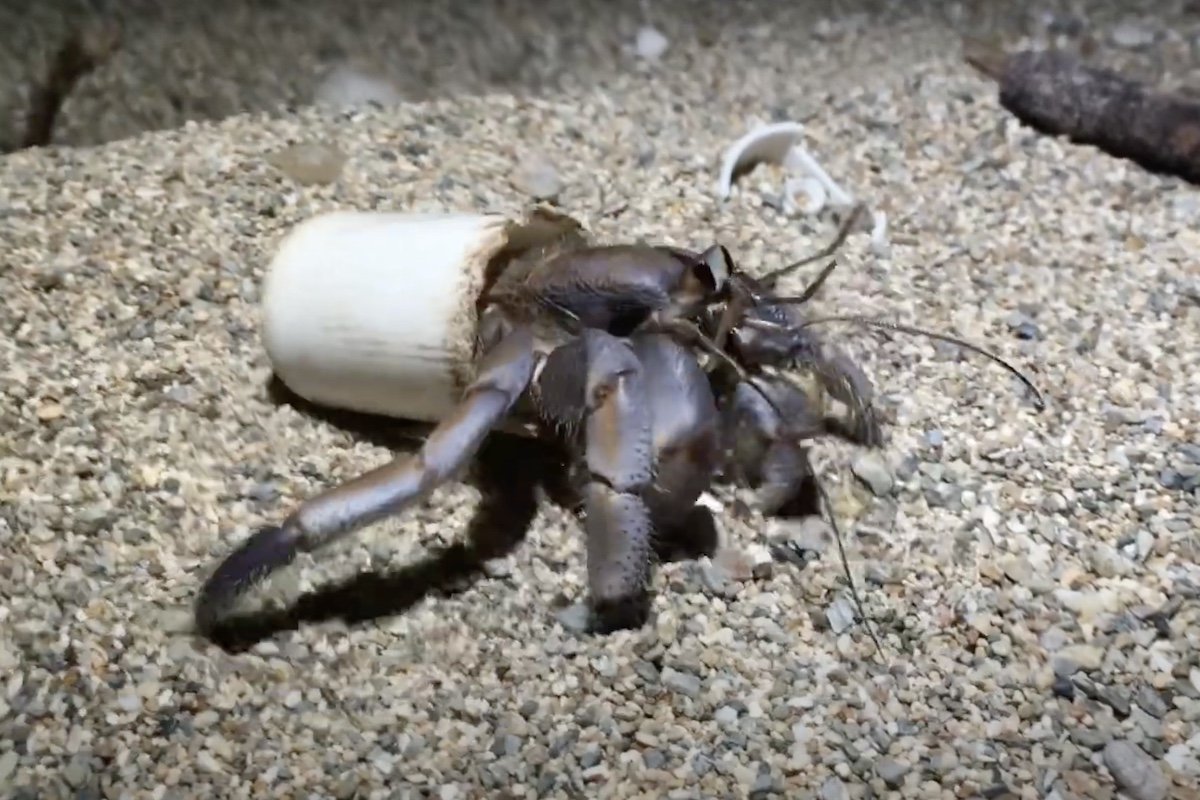
Man Took Action After Finding Hermit Crabs Living in Plastic Trash
More Empower
Camping
6 Best SUV Tents
Culture
The Ha‘ikū Stairs Trail, an Illegal Hiking Path in O’ahu, Will Be Demolished
News
WATCH: Sea Squirt With a Panda Face
Equip
Camping
6 Best SUV Tents
Camping
6 of the Best Coolers for Camping
Gear
6 Best Canopy Tents in 2024
More Equip
Explore
Culture
The Ha‘ikū Stairs Trail, an Illegal Hiking Path in O’ahu, Will Be Demolished
Conservation
Adorable and Threatened: ‘Species of Concern’ Spotted on Trail Cam
Culture
Next Time You See Bigfoot, It’s Probably Just Rob Lowe
More Explore
Empower
Culture
‘Too Friendly’ Labrador Finds Purpose Rescuing Quake Victims
Video
WATCH: Three-Legged Deer Makes Cameo on Maine Trail Cam
Conservation
Man Took Action After Finding Hermit Crabs Living in Plastic Trash
More Empower
More Stories
Scroll to Top