

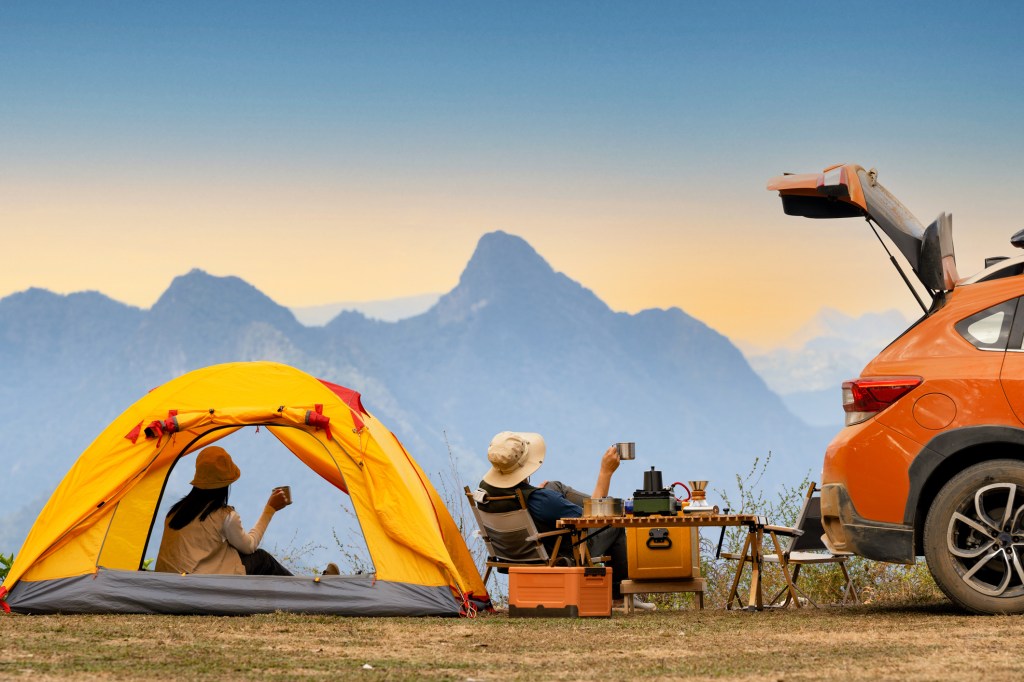
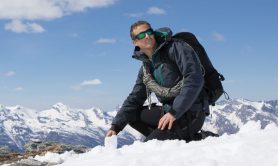
Picture this: You wake up in a tent. The air is cold outside of your sleeping bag. The sun is just about to rise, the first light of day peeking out from behind a nearby mountain range. A few birds have already woken up and are calling out to each other in the trees. Your body aches from the previous day’s hiking, but you’re happy to be out in the wilderness and living life to the fullest. You know that soon you’ll have to get out of your sleeping bag, step out into the morning—which, again, is very cold—and make breakfast.
Videos by Outdoors
Backpacking can be such a mix of good and bad. Which one will your breakfast be? Will you be one of the many sad saps for whom it’s a chore? You watch the sunrise with a hiking partner that you love, but you’re also spooning granola into your mouth and it becomes less appetizing with each bite. Or you pour cold water into an instant oatmeal packet and shovel it into your mouth so you can pack up and get hiking again.
I’m here to tell you we don’t have to live that way. I have seen the light, and I owe a great debt to my friend Jonathan Patrick Thomas (trail name: Janis Joplin) for pioneering these techniques below. It was his cooking setup, which we affectionately named “JJ’s Bushcrafé,” that was the revelation for my own shift in how I approach food in the backcountry.
Rethink your mess kit
The predominant school of thought regarding trail food is centered around efficiency. This is understandable because, as backpackers, we’re constantly balancing having enough food for sustained energy against the weight it puts on our backs.
But with the advent of ultralight backpacking gear, our base weights are getting lower and lower. To me, this is an open door. My suggestion: Reinvest some weight and some energy into your cooking setup. Allow yourself a little bit of luxury for both your mental and physical health. All food is energy, but the quality of your food and your drink is important. If you’re aiming to diversify your diet, you have to diversify your tools. Here, what I bring along on my backpacking trips for making breakfast.
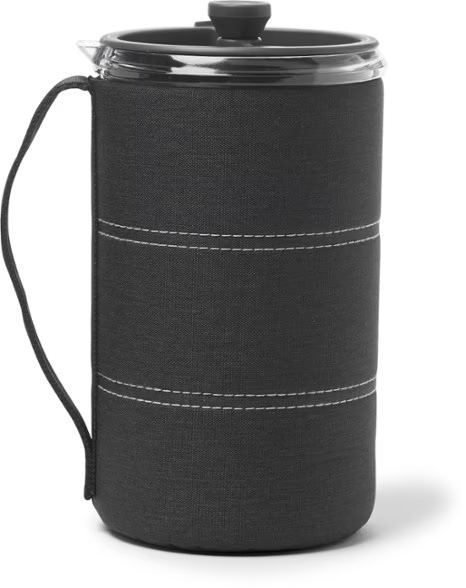
Tool 1: A Camping French Press
If you haven’t backpacked much, or if you haven’t spent days and weeks out in the backcountry, you may be shocked by what a real cup of coffee can do for your emotional state. Many people forego coffee entirely when in the backcountry. I’ve been there. Plenty of people opt for instant coffee as well, and I’ve been there, too. But if I’m going to do the work of boiling water in the morning, the payoff might as well be as good as it can be. And you deserve this, too.
My favorite camping French press is the GSI Outdoors Java Press. It’s made of lightweight BPA-free plastic with an insulating fabric sleeve to keep your brew warm to the last drop—total weight, just over 10 ounces. When choosing a mug, its weight is my number one factor—as always, with backpacking, it’s best to avoid heavy metal and glass or porcelain, which areheavy and breakable.
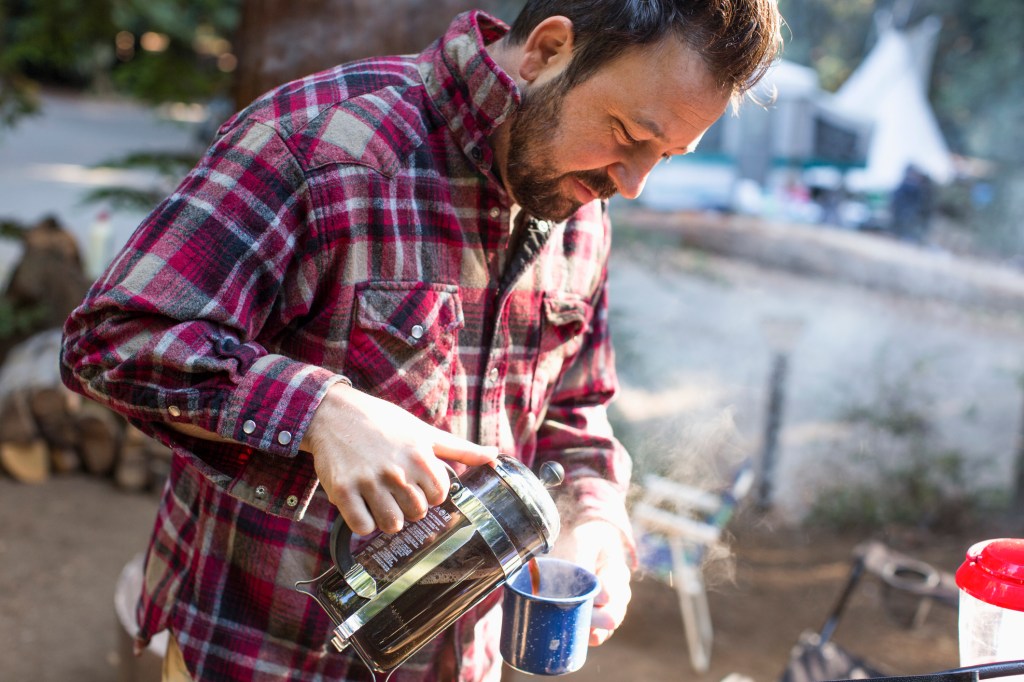
How to make camping coffee in a French press
For a tasty brew without muddy particles, start with coarse-ground coffee. If you’re leaving from home rather than resupplying during a long trip, you may even stop into your local coffee shop and ask them to grind it appropriately. As you’re planning your trip, bring only as much as you’ll need. You may even portion it out before you go so you’re not taking time to measure at camp or—worse—coming up short on your last pot. If you’re using the GSI Press that brews 30 ounces, you’ll want to stop just shy of eight tablespoons of ground coffee per use.
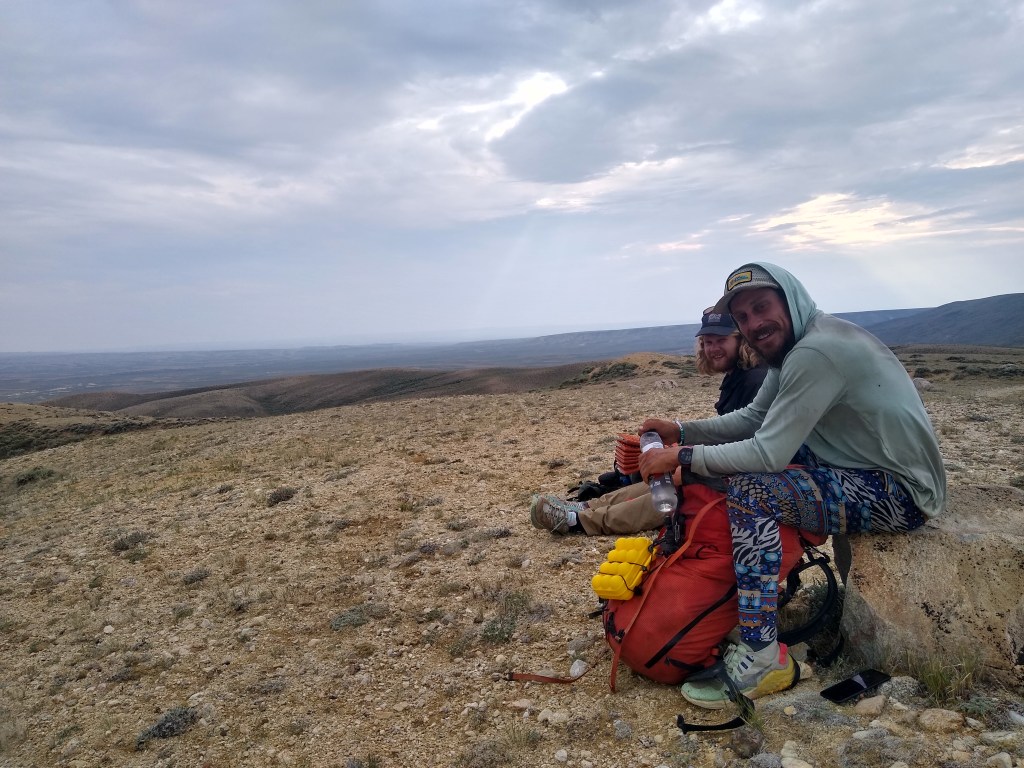
If you’re in a group, split the weight and split the work. Different people might carry the press, the mugs,, the coffee grounds, sugar or powdered creamer (as desired) and the pot in which you’ll boil water. The earliest riser among you may take on the responsibility of getting the water going or even brewing the coffee entirely and hoping the smell will save them the trouble of getting everyone else up.
To use the French press, put your pre-portioned coffee grounds in the bottom of the vessel. Pour boiling water over it in a circular motion, trying to wet the grounds as evenly as possible, stopping before the water level rises up above the coffee itself. Wait for a minute, watching for the “bloom,” in which you’ll see the coffee grounds expand. Then pour the remaining water to fill the pot, and place the plunger and lid atop so the plunger just kisses the surface of the water. Steep for another 4 to 5 minutes (depending on desired brew strength) before pressing the plunger to push the grounds to the bottom. Pour and enjoy your high-quality coffee.
Lastly, be sure to pack up your used coffee grounds as well. I know the temptation will be to just bury them, but the acidity isn’t good for almost any ecosystem. As always, leave no trace!
Tool 2: The Egg Briefcase

I can hear you now. You’re saying, “You want me to bring fragile little eggs into the big tough backcountry?” Yes, yes I do. Eggs are a vital part of breakfast. I’ve seen it done and, listen, the biggest limits in our lives are the mental limits we place on ourselves. If you say, “I can’t bring eggs backpacking,” then of course you can’t. If you say, “Why wouldn’t I bring eggs backpacking?” Then you’re on to something.
But the secret to keeping eggs from scrambling inside your pack is to get an Egg Briefcase for carrying them. There’s a smaller option that holds 6 instead of 12, as well. Could you make your own carry case? Probably. Will it be as effective? I doubt it, but I don’t want to count you out, either. You seem pretty resourceful.
How to bring eggs camping
Now, I’m not going to say nothing could ever go wrong when bringing eggs on a hike. But, to be a true outdoorsy person, you need to be able to roll with the punches. Should an egg break in transit, I recommend a technique known as the “emergency omelet.” This is another maneuver pioneered by Janis Joplin as well as Jackson “Sticks” Kramer—it functions exactly as it sounds.
But how can you reduce the risk of the eggs breaking? They need to move as little as possible. I recommend a small bungee cord or two to strap the briefcase down tightly on the side of your pack. Obviously, you don’t want the briefcase bouncing around. The other thing you’ll have to look out for is the eggs jostling around inside the case. Try filling any extra space around the eggs themselves with whatever materials you might have on hand. Knowing backpackers, this may look like cardboard scraps, wadded-up napkins, spare pieces of foam—anything soft you can get in there to keep the eggs stable.
And what about refrigeration? This is the trick. You have to be intentional about where you get your eggs. Grocery store eggs won’t do, as they’ve already been washed and lost their protective outer coating. If you’re planning a trip from a city, stop by a farmer’s market and talk to some of your local farmers—chances are, their eggs are unwashed, and if you can stock up beforehand, they’ll last about two weeks unrefrigerated. Then, on a longer trip, ask around when you’re in a town about local farmers’ markets, and you may just find that the trail provides.
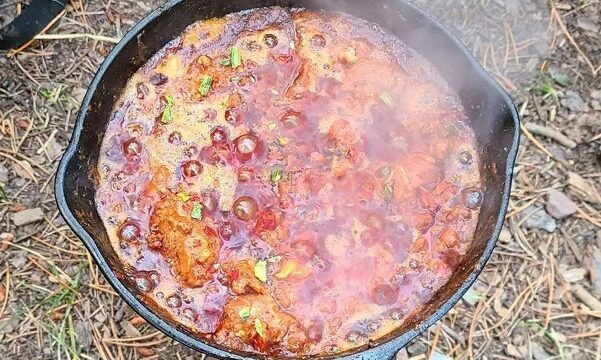
Tool 3: The Right Camping Pan
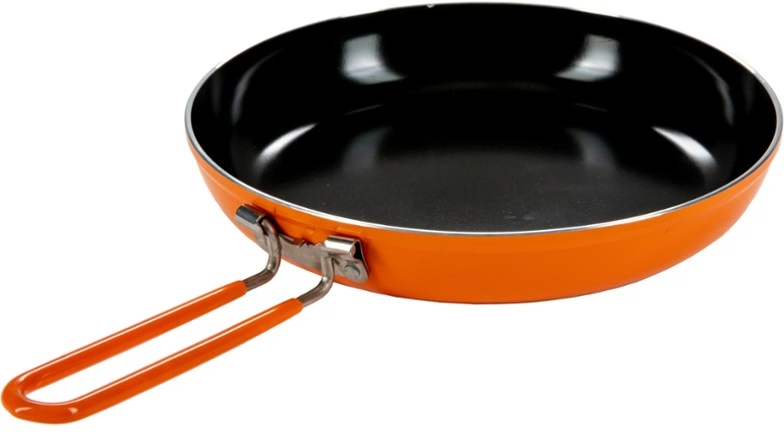
The pan is where the plan comes together. You want a real breakfast out on the trail? You need to be able to fry something up. The standard ultralight stove, isopropyl canister and titanium pot setup we all love has worked great—we’ve boiled our share of water for oatmeal. But let’s see what else we can do.
I suggest a couple of options. I’ll let you know now that Option 1 is only for the brave. In fact, to take me up on Option 1 would be to break a cardinal rule of backpacking. But please, believe me, it’s not impossible. We have to break a few eggs to make this omelet.
Option 1: You should consider cast iron. “But the weight!” I know—nobody wants to pack out metal. I told you to avoid it earlier in this very article! But, hear me out. Antique cast iron is significantly lighter than the modern-day variety. This is Janis Joplin’s influence on me again—he found his own antique skillet in an abandoned mine and restored it. If you’re willing to invest in a vintage cast-iron pan, which is useful at home as well as in the backcountry, you can find one as light as 3 or 4 pounds. People have tents heavier than that. “Griswold” and “Wagner” are names to look out for when shopping. If you’ve got a light enough pack otherwise, consider taking a walk on the wild side.
Option 2: If your overall pack weight is less dialed in, but you’d still like to diversify your food options, the Jetboil Summit Skillet is probably the best option for you. Weighing in at 10.6 ounces, it’s a much more reasonable choice for most folks. There are few things you can’t do with a good-quality nonstick pan.
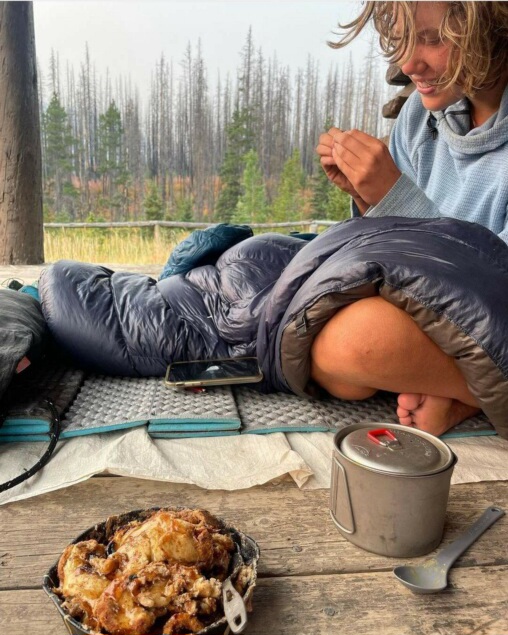
How to make a satisfying breakfast when camping
Disclaimer: I can provide my recommendations, my inspirations, my favorites, but the real joy of investing in your food setup will be making the food that you want. But for one, I’d suggest you plan to eat whatever you cook directly out of the pan and waste nothing.
As far as cooking utensils go, my trail family and I just made do with our sporks, but we probably would have appreciated a small, ultralight spatula. An extra bandana or a towel can be helpful for wiping off your pan and whatever utensils you do have, and be sure to pack out any food scraps you have left over.
On my backpacking trips, every time I make it into town, I seek out breakfast at a diner with hashbrowns, bacon and eggs. Why not bring it with you? Pack out a couple servings of hashbrowns for your first couple days out. You could incorporate some sausage and, of course, your eggs.
Use plenty of oil—these tiny Nalgene bottles are leak-proof—especially if you’re on a longer trip. When hungry for energy, your body will love the benefit of burning those fats, plus they make pan cleanup easier. Snag some extra hot sauce packets from your local fast-food place to complete the picture.
Oh, I still haven’t justified those eggs for you? Two words: French toast. If you’re committed, and I hope you are at this point, you can find some more small containers, or even plastic bags, in which to pack some cinnamon and some salt. Maybe we could get some vanilla in the mix, too, and maybe some powdered milk if you want to get fancy.
Again, planning your breakfast works best as a group effort. Break a couple eggs into someone’s titanium pot and make small batches of your egg batter at a time, so you’re not stuck with a bunch of leftover egg when everyone’s full. Then, it’s all in the bread. Pack out some brioche, some sourdough or some challah, and slice it thick. Fry until golden. Smother with Nutella and/or syrup.
What’s that? You never got your egg briefcase, and you’re eggless? That’s okay. Pick up some pancake mix; you’ll do just fine adding water. Maybe you’re a step ahead of me and you’re already planning a spill-free way to pack out butter—if you’re in colder, high-altitude settings, it may even stay as solid as it would in the fridge. Nutella and syrup will be a fantastic addition here as well.
These are some of my favorite breakfast options and have worked well for my trail family and me. They’ve warmed us on cold mornings and gotten us laughing and joking again after hard nights. But please, be creative and expand your backcountry menu. If dry, flavorless dehydrated food is what’s keeping you from the backcountry, please let that burden go. I’m here to tell you that convention is a tool until it is a barrier. Your main obstacle is a lack of refrigeration, and the only other limit is your creativity.


May I go hiking with you, please? It sounds delicious