
Cliffed out while canyoneering? Need to get off the mountain fast? These three methods let you use the tools you have to rappel quickly in an emergency. Some are as easy as tying a knot or hitch, and others require a little more equipment. Below, we’ll detail the best techniques to use if you’re short on time, short on gear, or trapped in the remote backcountry.
Videos by Outdoors
1. Munter Hitch
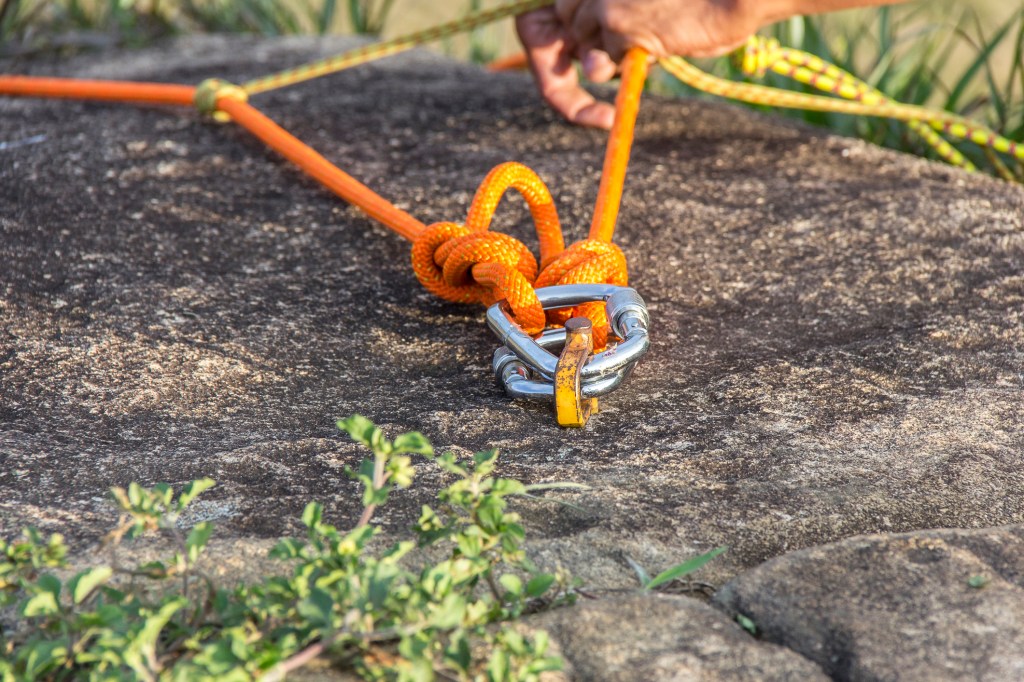
If you drop or forget your rappel device, the first trick up your sleeve should be the munter hitch. The munter hitch is fast and easy to tie, and it allows you to execute a rappel with very little gear—just a single locking carabiner.
How to do it
To tie a munter hitch, first grab the rope where you’d normally load your belay device. Then, create two loops side by side just as you would to start a clove hitch. Now, instead of nesting the two loops together to create a clove, fold them back to back like the covers of a book. Clip a carabiner through the resulting hole. You should then be able to rappel normally, relying on the hitch’s friction to slow your descent.
Pros
You can use a munter hitch for single-strand rappels as well as with two strands. It requires very little gear, and it’s relatively easy to remember. You can also use it to belay and lower a climber in a pinch.
Cons
The munter hitch is notorious for leaving ropes kinked and twisted. If you’re deep in the mountains and have a lot of rappels ahead of you, the munter hitch might not be the best tool for the job.

2. Carabiner Brake
While more gear-expensive and time-consuming to set up than the munter hitch, the carabiner brake is a great backup if you drop your rappel device. It’s especially useful if you’re somewhere remote and have to execute multiple rappels. With the carabiner brake system, you won’t have to worry about untangling a kinked rope after every descent.
How to do it
When you’re at an anchor and ready to rappel, get three locking carabiners ready. Clip one locking carabiner to your belay loop. Then clip a second locking carabiner to the first, making sure this carabiner’s narrow end is pointed away from your body. Lock both carabiners.
Now, push a bight of rope up through this second locker and fold it up and over the crook of the carabiner toward the anchor. Then, clip a third locking carabiner both through that bight and around the taut strand of rope leading to the anchor. Make sure the narrow end of this third locker is pointed toward your body. Lock the carabiner.
Now you can lean back on the rope. Make sure your rappel strand is getting pinched between the narrow ends of two carabiners (this is where the friction comes from), and ensure that all carabiners remain aligned as you descend.
Pros
You can use the carabiner brake method on either one strand or two, and it won’t kink up your rope. It uses relatively little gear.
Cons
The carabiner brake takes longer to set up than a munter hitch, and you’ll need at least three locking carabiners to do it. If you’re short on lockers, you can make do with two lockers and two non-lockers (or one locker and four non-lockers) by using the double-carabiner brake method. Note that the carabiner brake method requires extra vigilance to make sure all the carabiners remain in alignment and don’t twist or shift during the rappel. You’ll also need to have a set of carabiners that are the appropriate shape and of similar size.
3. Dulferitz Rappel
If you’re canyoneering, scrambling, or caught in an emergency situation without a harness, you can use a Dulfersitz rappel to descend a rope without any additional gear. Rope burn is almost guaranteed, but it could be a lifesaver in a true emergency.

How to do it
Facing the anchor, step over the rope so that it’s running through your legs. Then reach around the left side of your body and grab a large bight from the section of slack rope behind you. Throw this loop over your right shoulder. (The rope should now cross your chest from left hip to right shoulder.) The slack will be hanging down your back like a cape. Grab that slack you’re your left hand and bring it around your upper back and under your left armpit. Hold it in place with your left hand. You can now descend by slowly letting the rope pass through your left hand.
Pros
You can execute a Dulfersitz Rappel without a belay device, carabiners or even a harness. Like the carabiner brake and munter hitch methods, the Dulfersitz rappel can be used with either a single-strand system or with two strands.
Cons
Since the Dulfersitz relies on the friction of the rope against your body to slow you down, it’s extremely uncomfortable. It’s also less secure than either the carabiner brake or the munter hitch, both of which give you more stability and control.
Disclaimer: Rappelling, even with appropriate equipment, is dangerous. Always practice rappelling methods in the company of a certified guide or instructor before using them in the real world. Always use a rappel device and appropriate backup methods whenever possible; these three methods should be reserved for supervised practice or emergency use only.
Corey Buhay is a Colorado-based writer and editor and a former member of the U.S. Ice Climbing Team. She’s been climbing rock, ice, and alpine terrain for 10 years.


