

Videos by Outdoors
Since the measure of success of every fishing outing, whether it is on its own or connected to other outdoor activities, is making memories, it’s important to capture them to reminisce and to share. The most effective and time-efficient way to do that is by taking pictures and videos with your phone.
This isn’t new. It’s likely smartphones are used more to capture images than to make phone calls. This makes picture taking far easier than it used to be. Your phone, literally, goes everywhere you do!
Zebco and 50 Campfires have compiled a list of tips to help you take the best fishing photos ever and to make them more interesting to those with whom you’ll share. In fact, most of this advice applies to all photography with your phone.
Instagram Tip: Be sure to share your favorite fishing photos on Instagram with the hashtag #ZebcoFishing. You can also tag Zebco with @zebcofishing for a chance to be featured on their page!
Best Tips For Taking Fishing Pictures
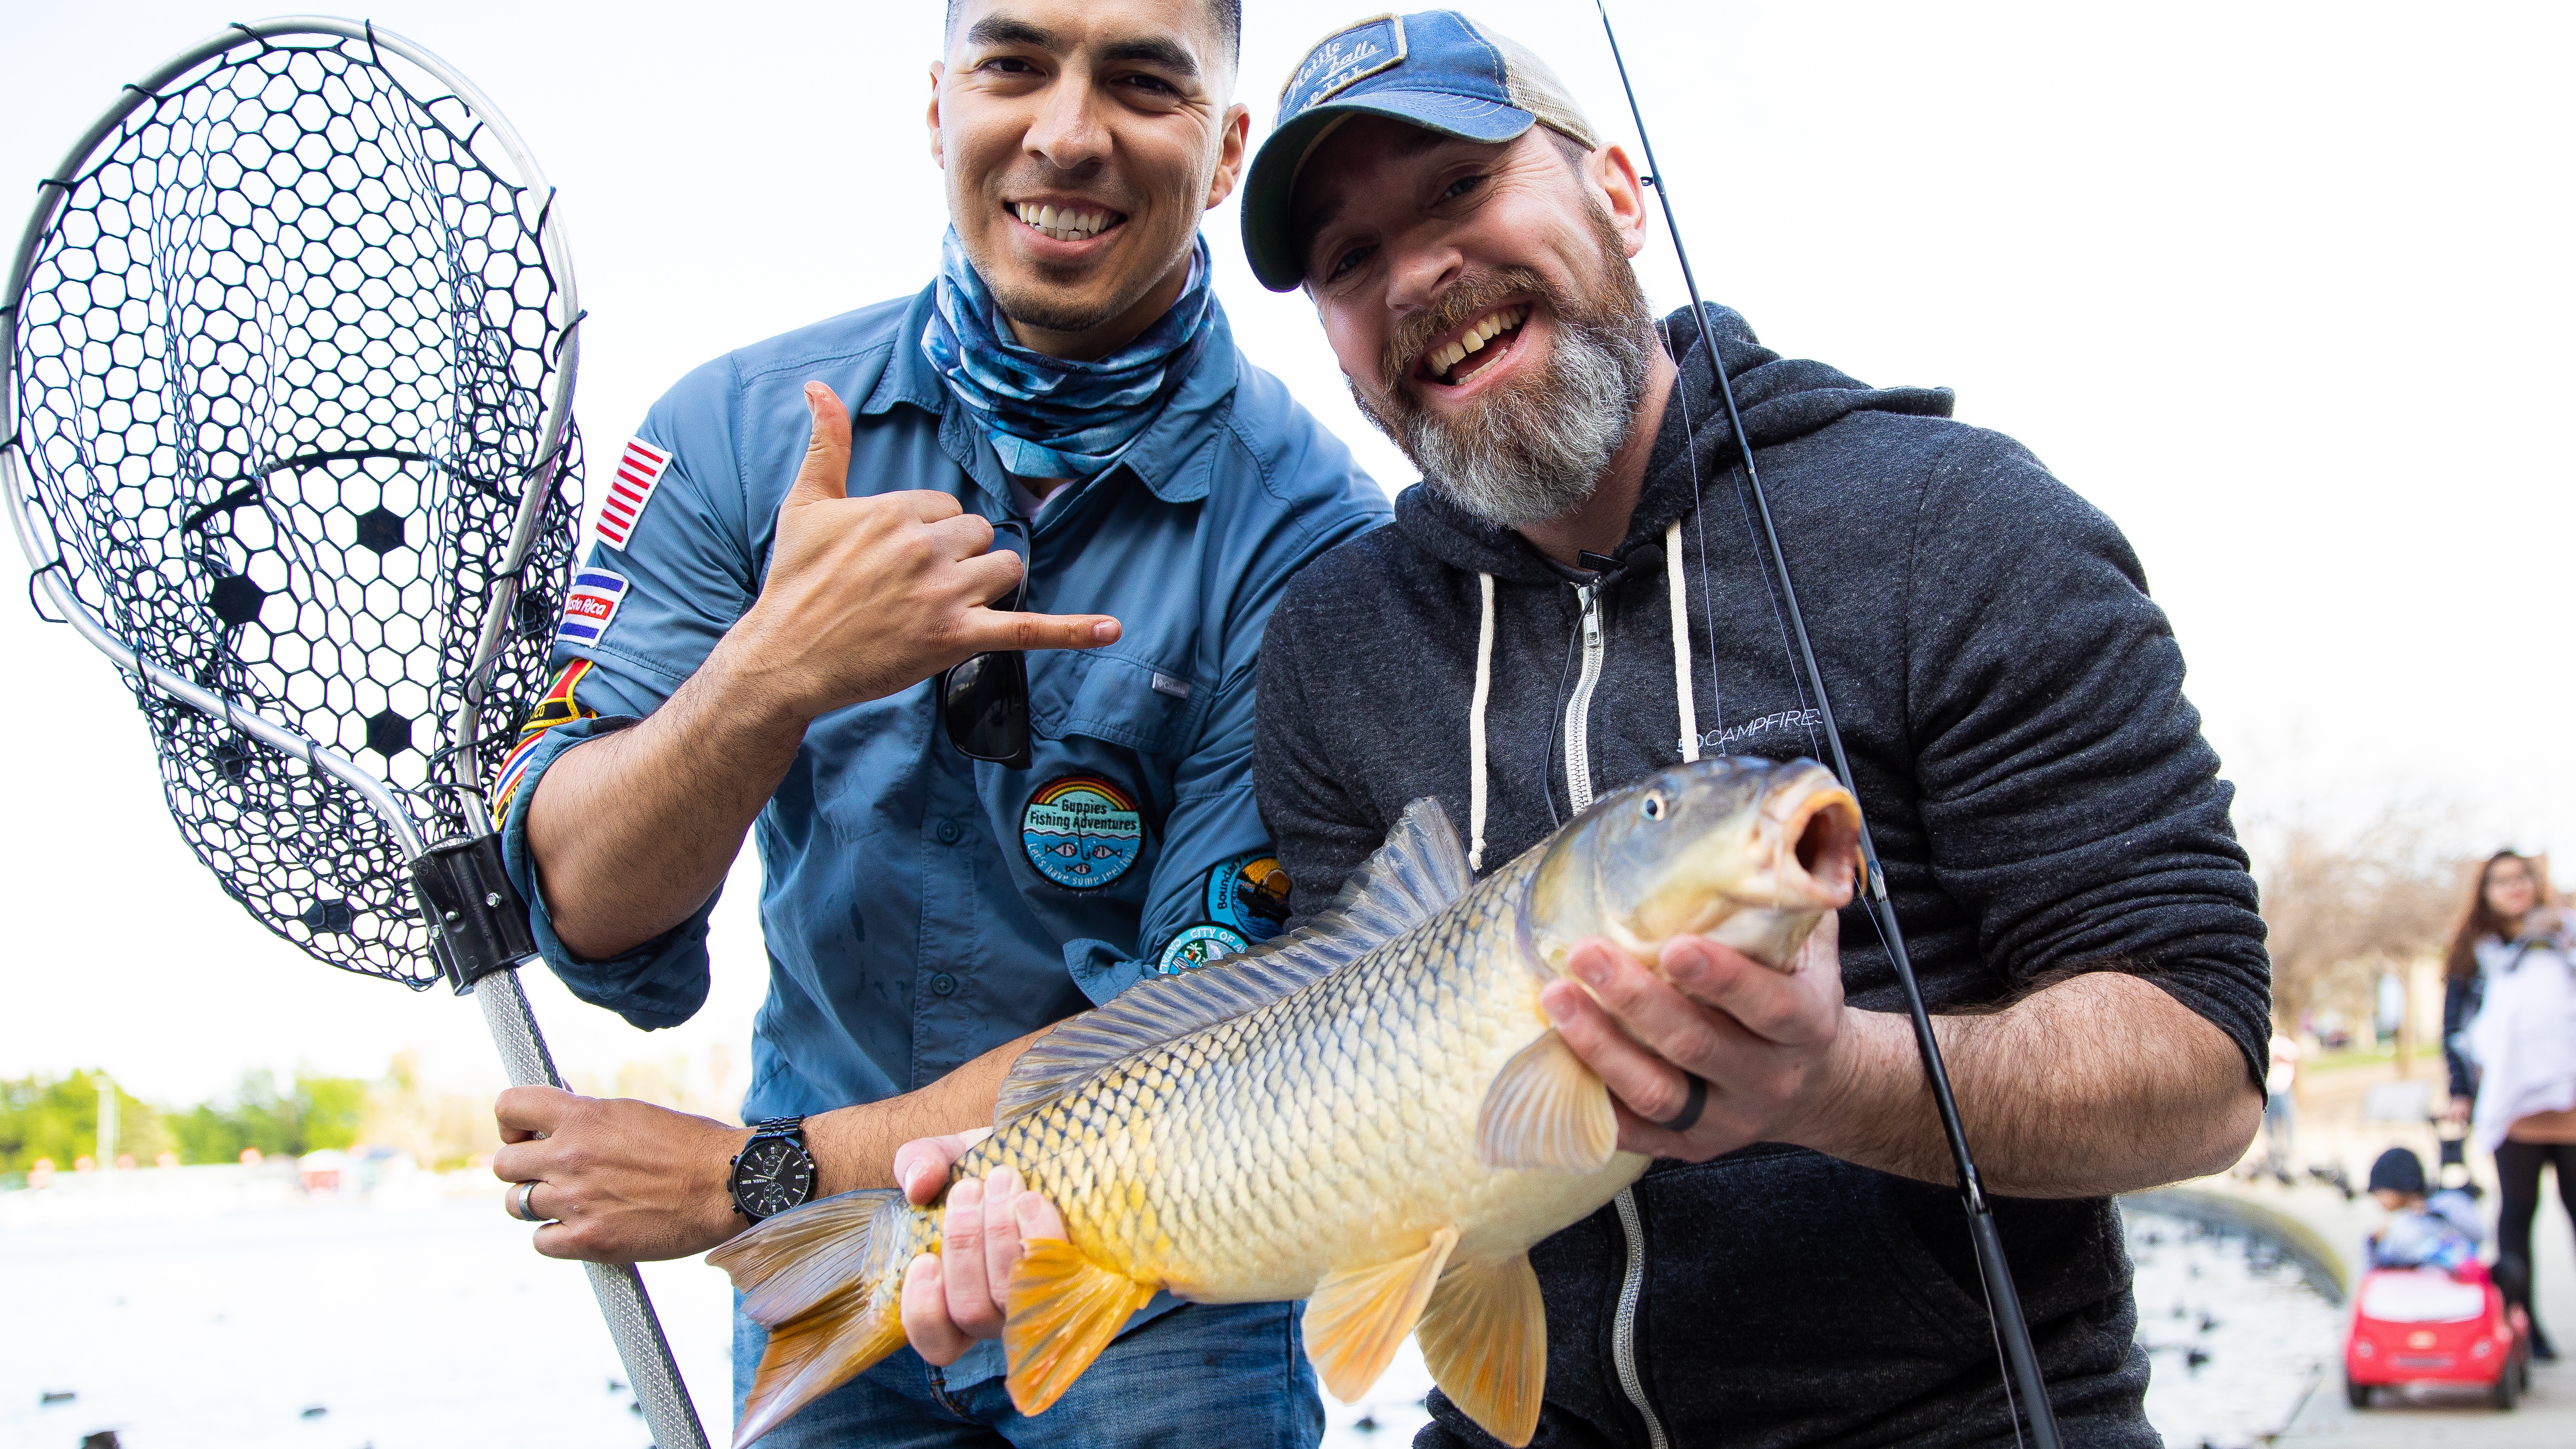
Where’s the sun? – Instead of putting the sun directly behind you to get it on the proud angler’s face, try positioning the shot so the sun is coming in from 45 degrees off either of your shoulders. Have the angler turn the fish he/she is holding so its back is angled slightly toward the sun. This reduces the stark whiteness of the fish’s belly, which can be a distraction.
Ball caps back, please. – Even if you position the shot with the sun over your shoulder, if the angler’s ball cap is pulled down too far, it’s going to cast a harsh shadow across the face, eyes, and even nose. This is known jokingly as “the black hole.” Ask the subject to tip the hat back at least to the point where the sun gets to his/her eyes. While you might get some protests of “that’s not how I wear it,” ask to try it for just a couple of shots. You’ll be much more pleased with the results.
Sunglasses off, please. – When celebrities wear dark sunglasses, they are trying to stay incognito. We take fishing photos for exactly the opposite reason; we want to share and show off success. Behind dark, polarized sunglasses, you may not be able to tell who the happy angler is. Take some with the sunglasses in place, but also ask the angler to remove them or drop them on the lanyard around his/her neck.
Overcast is your friend. – Sometimes we only think of taking photos on “picture perfect” days when the sun is shining brightly. Ask any professional outdoor photographer and they’ll tell you the opposite; picture perfect days are slightly overcast. Diffused sunlight reduces stark shadows and makes positioning your subject much less problematic.
Use the flash. – It’s hard to go wrong using the flash on your camera … especially when the sun is shining brightly. It helps fill in those harsh shadows and brings out the beautiful colors and detail of the fish.
Get close. – Either move the camera right up to the fish or use the digital zoom (pinch and pull on your phone’s screen) to fill the frame with the subject. If the angler and the fish are little, have him/her hold the fish close to his/her face. Most phones have a wide-angle lens, so getting close will fill the frame better.
De-clutter. – Getting close will take a lot of the background out of the picture and put the focus on the fish and the angler. However, sometimes you need to pull back to capture the entirety of a large fish in the shot. For others, you just want to include some background to show the setting where the fish was caught. In either case, try to de-clutter the background. Pick a neutral backdrop such as the sky, or one that really sets the scene. If there will be other people in the shot, get them to look at the camera rather than being just body parts and distracting blurred movement.
Some bombs are okay. – Photo bombing can be fun, and it’s just part of a social day of fishing. However, make sure to capture non-bombed images as well as the ones including the prankster. You’ll enjoy both memories later on.
How to hold a fish. – Exactly how you hold a fish will depend somewhat on the type of fish. For example, you can “lip” a largemouth bass because it doesn’t have any teeth and this hold is very easy on a fish you’ll be releasing. However, don’t put your fingers in the mouth of a pike or walleye. Their teeth are needle sharp and there are lots of them. You won’t be able to fit your fingers in the mouth of pan fish either, so you might try holding them flat in the palms of your two hands held side by side.
How To Hold Fish For Photos
Respect the fish. – Not only is it important to hold the fish in a way that looks good in photos and is safe for anglers, but you should also consider respect for the fish. If you plan to release the fish, handle the fish as little as possible. You can even make some beautiful images of a fish still in the net or of the angler making the release.
Get low. – Getting below the sight line of your subject and shooting up at him/her consistently results in the best photos. It is usually the most flattering to the subject and presents fish at their best. Just remember to “cheat” the fish’s back, rather than the white belly, toward the camera.
Hold it proudly. – Have the angler hold the fish away from his/her body and closer to the camera. Yes, it “embellishes” the size of the fish (how is that NOT a good thing?), but also makes for a more interesting photo.
Where to focus. – Phone cameras have that circle you can move around which determines the focus and sets the optimal lighting for what’s inside it. Since phone cameras have wide-angle lenses, they generally keep everything in focus (unless you’re trying for a super-tight shot), it’s more important to use that circle for lighting. Try a couple of shots with that circle on the fish and a couple with it on the subject’s face to see which is better for the situation.
How to hold the camera. – For photography, take multiple shots with the camera held both vertically and horizontally, but for video shoot everything horizontally. This may seem unnatural at first, but all social media sharing videos are based on film format. That’s why you see so many filtered videos that are reshaped to fill up the screen. You’ll be much happier if you shoot videos exclusively in horizontal format.
Photos and video work together. – When you’re editing together video of your adventure, remember that photos work well with video. There are even filters that let you animate your still shots. And slide shows put together with a soundtrack will beautifully capture the mood and the memories.
Have Fun With Filters
Many social media apps like Instagram and Facebook have free filters you can apply to your photos for a more dramatic effect. If you want to edit your photos manually, a good place to start is exposure, contrast, and vibrance (sometimes called warmth). By adjusting all three you can make even the cloudiest day look epic!
Shoot everything. – If you’re editing together a video of your adventure, you’ll NEVER regret having too much content with which to work. It costs nothing to overshoot, but you might pay the price of regret if you miss special moments because you didn’t have your camera out. Same goes for taking photos.
Remember, it’s not just fish. – Whether taking photos or video, remember you’re out to capture all the success of the trip. It’s not just the fish that are caught, but the special moments that can’t be repeated. Candid shots or images of your companions mugging for the camera are the stuff that really makes sharing worthwhile. Remember, success isn’t just about catching fish.
Quick Links To The Ultimate Fishing Guide presented by Zebco
How To Guarantee Success Every Time You Go Fishing
How To Prepare : The Ultimate Fishing Gear List
How To Handle a Fish After You Catch It
Best Tips For Taking Fishing Pictures
Buying Your License and Understanding Regulations